A combination of Photo Gallery pages can be used together to
create the effect of photo "albums" where you will have a photo album cover
page (main menu of all your photo galleries), which takes the visitor to each
individual album of photos.
Note: Please familiarize
yourself with Adding
pages in WebFrame and using
the Photo Gallery page type before proceeding with the instructions below.
First you will need to set up your pages in WebFrame. You
will add the main album cover page (ex: Low Maintenance Decks), and individual subpages
under the main album cover page to create your photo gallery albums (ex:
Project 1-15).
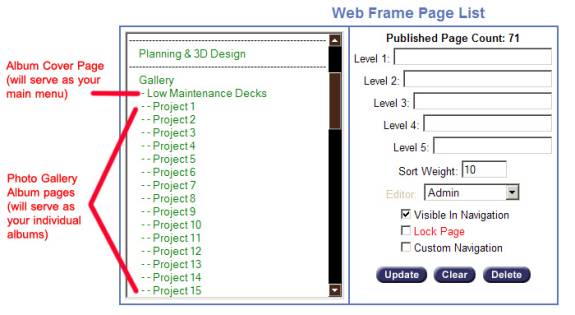
Once your pages are set up, go to Edit the main album cover
page (ex: Low Maintenance Decks). Follow
the basic instructions to set up this page using the Photo Gallery page
type with the Classic Gallery display. Each of the images uploaded will serve
as the album cover for each photo gallery album subpages.
Next, we will link each of these album cover images, on the
main album cover page, to their corresponding photo gallery subpages.
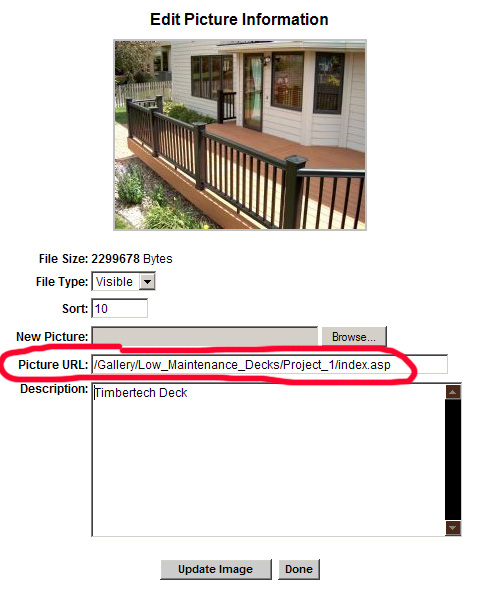
Go to your first photo gallery album subpage (ex: Project 1),
and copy the Link for that page:

Return to your main album cover page, go to [Manage
Gallery], then [Edit] under your first image. Paste the link you just copied
into the Picture URL field, then Update Image.
When you return to main album cover page and click on the
first album cover image, it should take you to the subpage you just linked to
(ex: Project 1).
Following the basic photo
gallery page set up instructions, set up the subpage using the Photo
Gallery page type. Upload all the photos you want to include in this album
using the photo
gallery display option that your prefer.
Your first album is complete. Repeat the steps above to
create individual photo gallery subpages and link those subpages to the main
album cover page.