The File Library provides a
centralized location to manage documents, images and videos on your website.
�
Accessing the File Library
�
Uploading a File
�
Replacing an Existing File
�
Linking to a File in the File Library
�
Viewing the Contents of a File
�
Changing the Viewing Settings of Files
�
Renaming a File
�
Downloading a File
�
Deleting a File
�
Creating Subfolders
Accessing the File
Library
To access the File Library, log
into your website. Go to the WebFrame Page List, then choose Edit File Library
from the left side. Your File Library will load (may take a moment depending on
the number of files you have stored in the library), and this window will
display:

On the left you will see 3 folders in which you can organize files.
Across the top are menu options.� Below
the main menu options are the files stored in the selected folder at the left.
If you right click on a file in the file library, you will be given additional
menu options.
[Top of
page]
Uploading a File
Select one of the folders from the left to match the type of file you will be
uploading: Files (documents), Images or Video. 1) In the toolbar across the
top, choose Upload . 2) Browse and select the file you wish to upload. 3)
Upload the selected file to the File Library.
[Top of
page]
Replacing an Existing File
The File Library does not allow you to directly replace (overwrite) an existing
document. If you try to do so, it will append the file name with a "[1]".� This is a safety check to make sure you
don't overwrite a file unintentionally. To replace a document, you can first
delete the old document, then upload the new document. If you keep the file
names exactly the same, you won't have to update those links as they appear on
the page(s) of your website. If the file name changes (or a [1] is appended to
the file during upload) you will have to either 1) rename that document to the
path being used in your hyperlink or 2) change the path in the hyperlinks on
your web pages. See also, Uploading a File
and Linking to a File in the File
Library.
[Top of
page]
Linking to a File in the File Library
Right click on the file you wish to link to, and choose Select from the menu
options. The path to this file is populated in the Selected File Path field.
(You may also left double click on a file to view its path.) This is the path
name you will use when creating a hyperlink to the file on your website. Once a
file is in your File Library, you can link to it anywhere on your website.
[Top of
page]
Viewing the
Contents of a File
If you would like to view a file, right click on that file and choose View from
the menu options. The file will automatically open in an appropriate
application.
[Top of
page]
Changing the Viewing Settings of Files
Different viewing options are available to aid in locating a particular file.
Choose Settings from the main menu.
[Top of
page]
Renaming a File
To change the name of a file, right click on that file and choose Rename from
the menu options. Enter the new name keeping the file extension unchanged. (Ex:� .pdf)
[Top of
page]
Downloading a File
To download a file, right click on that file and choose Dowload from the menu
options. Choose from the options presented in the pop up window. 
[Top of
page]
Deleting a
File
If you would like to permanently remove a file from the File Library, right
click on that file and choose Delete from the menu options.
[Top of
page]
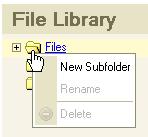
Creating
Subfolders
To create subfolders within any of the 3 default folders (Files, Images,
Video), simply right click on the folder where you want to create a subfolder
and select the "New Subfolder" option
[Top of
page]